How to Sew a Bucket Hat
Introduction
The bucket hat is a timeless fashion accessory that has seen a resurgence in recent years. Originally designed for practicality, this hat has become a go-to for both casual and streetwear looks. Whether you’re looking to shield yourself from the sun or simply add a stylish element to your outfit, sewing your own bucket hat allows you to customize it to your exact preferences.
In this step-by-step guide, you’ll learn how to sew a bucket hat, even if you’re a beginner. From choosing the right fabric to adding personalized touches, this project is not only fun but also rewarding. Plus, making your own accessories is a great way to express your creativity while developing your sewing skills.
1. Materials You’ll Need
Before you start sewing your bucket hat, it’s essential to gather all the necessary materials. Having everything ready will make the process smoother and more enjoyable. Here’s a list of the key items you’ll need:
1. Fabric:
Choose a sturdy yet flexible fabric like cotton, denim, or linen. You’ll need about half a yard of fabric, depending on the size of your hat. Make sure to pick a material that suits your style and the season.
2. Lining Fabric (optional):
If you want to add a lining for extra structure or comfort, you’ll need an additional piece of lightweight fabric, such as cotton or muslin.
3. Sewing Machine:
While it’s possible to hand sew a bucket hat, a sewing machine will make the process faster and give you cleaner, more durable seams.
4. Thread:
Match your thread to the color of your fabric. Consider using a stronger thread if your fabric is thick or heavy, such as denim thread.
5. Sewing Pins or Clips:
These will help hold your fabric in place as you sew. Clips are especially useful for thicker fabrics that are difficult to pin.
6. Scissors:
A good pair of fabric scissors is crucial for cutting your pieces accurately. You’ll also need small trimming scissors for cutting threads.
7. Measuring Tape or Ruler:
Precision is key when cutting and sewing. Use a measuring tape to ensure your fabric pieces are the correct size.
8. Bucket Hat Pattern:
You can either buy a pre-made pattern or create your own. The pattern should include pieces for the crown, brim, and side band.
9. Iron and Ironing Board:
Pressing your fabric and seams as you go will make sewing easier and give your hat a professional finish.

2. Choosing the Right Fabric
Selecting the right fabric is crucial for both the style and functionality of your bucket hat. The fabric you choose will determine the hat’s structure, durability, and comfort. Here are some factors to consider when picking your fabric:
1. Weight and Durability:
For a sturdy bucket hat that holds its shape, opt for medium-weight fabrics like denim, canvas, or twill. These fabrics provide structure and are durable enough for outdoor wear. If you want a more relaxed or lightweight hat, fabrics like cotton or linen are great choices, especially for warmer weather.
2. Breathability:
If you’re making a summer bucket hat, choose fabrics that are breathable and lightweight, such as cotton or linen. These materials will keep you cool in the heat. For a winter hat, consider thicker, insulating fabrics like wool or corduroy to keep you warm.
3. Pattern and Color:
The fabric’s pattern and color play a big role in your hat’s final look. Solid colors provide a classic, versatile appearance, while bold patterns like florals, stripes, or animal prints can make your hat a statement piece. Make sure to consider how the pattern will look when cut and sewn into curved pieces.
4. Water Resistance:
If you’re planning to wear your hat outdoors, especially in wet conditions, consider water-resistant or waterproof fabrics like treated cotton or nylon. These fabrics will help keep your head dry during unexpected rain showers.
5. Comfort:
While style is important, don’t forget about comfort. Make sure the fabric is soft and smooth enough for long-term wear. If the fabric is rough, you may want to consider adding a lining for added comfort.

3. Cutting and Preparing Your Fabric
Once you’ve selected the perfect fabric, the next step is to properly cut and prepare it for sewing. Accurate cutting is essential to ensure your bucket hat pieces fit together smoothly and look professional. Follow these steps to get started:
1. Wash and Press Your Fabric:
Before cutting, make sure to pre-wash your fabric to prevent shrinkage after your hat is completed. After washing, press your fabric with an iron to remove any wrinkles. This will ensure your fabric lies flat and cuts cleanly.
2. Use a Bucket Hat Pattern:
If you’re using a pre-made bucket hat pattern, lay it out on your pressed fabric. If you’re making your own pattern, you’ll need to create pieces for the crown, side band, and brim. Each piece should be carefully measured to fit the size of the hat you’re making.
3. Position Your Pattern Correctly:
Place your pattern pieces on the fabric, paying attention to the grainline (the direction of the threads in the fabric). For a structured look, ensure the grainline runs vertically on all pieces. Pin or clip the pattern pieces securely to the fabric to prevent any shifting while cutting.
4. Cut the Fabric Accurately:
Use sharp fabric scissors to cut along the edges of your pattern pieces. Make sure to cut precisely, following the outline of the pattern. Accurate cutting is crucial for ensuring your pieces fit together correctly when you start sewing.
5. Mark Important Points:
Use a fabric marker or tailor’s chalk to mark any important points indicated on your pattern, such as notches or seam allowances. These markings will guide you as you sew the pieces together.
6. Prepare the Lining (Optional):
If you’re adding a lining, repeat the same cutting steps with your lining fabric. Make sure the lining pieces are cut to the same dimensions as the outer fabric.

4. Sewing the Crown and Side Band
Now that your fabric is cut and prepared, it’s time to begin sewing the crown and side band of your bucket hat. This step involves assembling the top part of the hat and attaching the side band to give the hat its shape. Follow these steps carefully for a clean and professional finish:
1. Sew the Crown Piece:
Take the circular crown piece of your hat and, if necessary, finish the edges with a zigzag stitch or serger to prevent fraying. Next, fold the crown in half to find the center, and mark it with a pin. This will help you align the crown properly when attaching the side band.
2. Prepare the Side Band:
Take the side band piece and fold it in half with the right sides facing each other. Pin or clip the edges together. Sew along the short edge using a straight stitch, creating a circular band. Press the seam open with an iron for a flat finish.
3. Attach the Side Band to the Crown:
With the right sides facing each other, pin the side band to the crown piece. Start by aligning the side band’s seam with the center mark of the crown, and pin around the entire edge. Make sure the pieces are aligned evenly to avoid bunching or gaps. Sew around the perimeter of the crown using a straight stitch, ensuring the seam is smooth and secure.
4. Press the Seams:
After sewing, press the seam between the crown and side band with an iron. This helps the fabric lie flat and gives your hat a more professional finish. If desired, you can topstitch along the seam for added durability and a decorative touch.

5. Attaching the Brim
The next step in creating your bucket hat is to attach the brim. This is where your hat will gain its signature wide, downward-sloping shape. Attaching the brim requires precision, but following these steps will make it easier:
1. Prepare the Brim Pieces:
Take your brim pieces (which are usually cut into two or more sections depending on your pattern) and sew them together along the short edges, right sides facing each other. This will create a circular shape for the brim. Once sewn, press the seams flat with an iron to make the brim neat and smooth.
2. Pin the Brim to the Side Band:
With the right sides of the fabric facing each other, pin the brim to the side band of the hat. Start by aligning the seams of the brim with the seams of the side band to ensure an even fit. Then, pin around the entire circumference of the hat, making sure the brim is evenly distributed around the side band.
3. Sew the Brim to the Side Band:
Sew the brim to the side band using a straight stitch, following the pinned edge. Make sure to sew slowly and evenly to avoid puckering or uneven seams. Once sewn, remove the pins and press the seam flat with an iron.
4. Topstitch the Brim (Optional):
For a more professional finish, you can topstitch the brim. This involves sewing additional rows of stitching around the brim, usually 1/4 inch apart. This not only adds a decorative element but also helps the brim maintain its shape.
5. Check the Shape:
Once the brim is attached, try the hat on to ensure that the brim lies flat and that the overall shape is as desired. If the brim feels too floppy, consider using a heavier fabric for your next project or adding a layer of interfacing for extra stiffness.
Image Recommendation: Place an image here showing the process of pinning the brim to the side band, with a close-up of the fabric under the sewing machine.
Image Suggestion: A shot of the bucket hat’s brim being sewn to the side band, with the brim neatly pinned in place. The image should show the seam being stitched on a sewing machine, with emphasis on the alignment between the brim and the side band, to guide readers in achieving an accurate attachment.
6. Finishing Touches
Once the main components of your bucket hat are sewn together, it’s time to focus on the finishing touches that will elevate the look and durability of your hat. These final details ensure a polished appearance and make your hat ready to wear.
1. Trimming Excess Threads:
After sewing all the pieces, inspect your hat for any loose or excess threads. Use small scissors to carefully trim these off, giving your hat a cleaner, professional look.
2. Adding a Lining (Optional):
If you opted to add a lining to your bucket hat, now is the time to sew it in. Follow the same steps you used for the outer fabric—sewing the crown, side band, and brim—then insert the lining into the hat. Attach the lining by sewing it around the inner edge of the brim.
3. Press the Seams:
Use an iron to press all the seams of your hat. This will help smooth out any wrinkles and give the hat a more structured appearance. Focus especially on the seam between the side band and the brim, ensuring it lays flat.
4. Topstitching for Durability:
For extra durability, consider adding a topstitch along the edges of the brim and side band. This not only reinforces the seams but also adds a decorative element. You can use a matching or contrasting thread, depending on your preference.
5. Custom Details:
This is the perfect moment to add any custom details that make your bucket hat unique. Consider attaching a patch, embroidery, or even a decorative button. You can also play with fabric paints or sew on a ribbon around the side band for an extra personal touch.
6. Final Fit Check:
Before calling your project finished, try the hat on one last time to ensure a proper fit and check for any areas that need adjustments. If the brim feels too floppy or the fit is too loose, small tweaks can still be made, such as adding an extra seam or using interfacing to stiffen the brim.

7. Customizing Your Bucket Hat
One of the most exciting aspects of making a bucket hat is the ability to customize it to suit your personal style. With a few creative touches, you can transform a basic bucket hat into something truly unique. Here are several ways to add flair and personality to your hat:
1. Embroidery:
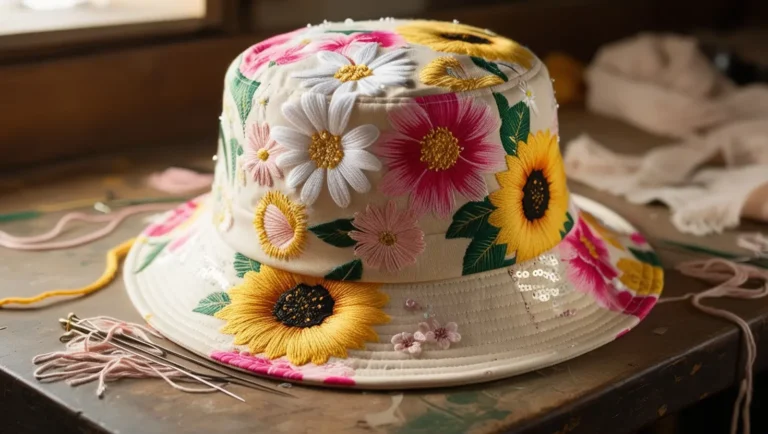
Adding embroidery is a fantastic way to personalize your hat. You can stitch initials, patterns, or even small images onto the side band or brim. Use embroidery floss in contrasting colors to make the design pop, or keep it subtle with a matching thread for a more minimalist look.
2. Patches:
Attaching patches is another easy way to customize your bucket hat. You can find patches in various shapes, sizes, and designs—from sports team logos to fun icons like flowers or animals. Simply sew or iron the patches onto the side band or even on the top of the crown.
3. Fabric Paint:
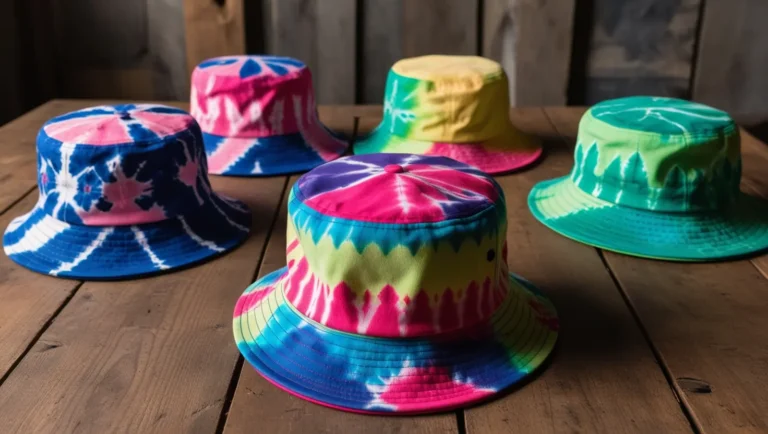
If you’re artistically inclined, consider using fabric paint to create custom designs on your hat. You can paint freehand patterns, geometric shapes, or even tie-dye your hat for a bold, colorful effect. Be sure to use fabric-safe paints so the design lasts after washing.
4. Decorative Stitching:
Beyond the basic seams, you can add decorative stitching along the brim or around the side band. This can be done using a contrasting thread color to give your hat a unique edge. Experiment with stitches like zigzag or wave patterns for an extra touch of creativity.
5. Ribbons or Trim:
Sew a ribbon or decorative trim around the side band of your hat for a fun, chic look. You can choose a plain satin ribbon for elegance or a patterned trim for something more playful. Ribbons with texture, such as grosgrain or velvet, add dimension to your bucket hat.
6. Beads and Sequins:
For a more glamorous or festival-ready bucket hat, you can sew on beads or sequins. These can be added in patterns or scattered randomly for a sparkling effect. Just ensure that any embellishments are securely attached so they don’t fall off during wear.

8. Common Mistakes to Avoid
When sewing a bucket hat, there are a few common mistakes that can make the process more difficult or result in a less-than-perfect finish. Avoiding these errors will help you achieve a high-quality, professional-looking hat. Here are some pitfalls to watch out for:
1. Using the Wrong Fabric:
One of the biggest mistakes is choosing the wrong fabric. Avoid fabrics that are too stiff or too stretchy, as they can make the hat uncomfortable or difficult to shape. Instead, opt for medium-weight fabrics like cotton, denim, or canvas, which provide structure without being too rigid.
2. Not Cutting Accurately:
Precision is key when cutting your fabric. Small errors in cutting can lead to uneven seams or mismatched parts. Always use a sharp pair of fabric scissors and take your time to ensure your pieces are cut cleanly and to the correct dimensions. Using pattern weights and a rotary cutter can also help.
3. Skipping the Seam Allowance:
Many beginners forget to leave a proper seam allowance, which can lead to seams that are too narrow and weak. Be sure to follow your pattern’s instructions and leave enough space (usually 1/4 inch to 1/2 inch) for your seams. This will ensure your hat is sturdy and fits well.
4. Inconsistent Stitching:
Uneven or inconsistent stitching is a common issue, especially when sewing curved parts like the brim or crown. Take your time and sew slowly, guiding the fabric carefully through the machine. It can also help to use a shorter stitch length for better control on curves.
5. Skipping the Ironing Step:
Skipping ironing between steps may seem like a time-saver, but it can actually make your final product look sloppy. Pressing your seams flat at every stage helps the fabric lay neatly and ensures clean, crisp lines in the finished hat. Always keep an iron handy during the sewing process.
6. Not Aligning Seams Properly:
Misaligned seams can throw off the entire shape of your hat, especially where the side band meets the brim. Pinning the pieces in place before sewing helps ensure everything is aligned correctly. Double-checking alignment before sewing will save you from having to undo stitches later.

9. FAQs About Sewing a Bucket Hat
As you embark on your journey to sew a bucket hat, you may have some questions. Here are some frequently asked questions (FAQs) that can help clarify common concerns and provide additional tips for your project:
1. What is the best fabric for a bucket hat?
The ideal fabrics for a bucket hat are cotton, canvas, or denim. These materials offer the right balance of durability and breathability. Avoid stretchy or overly stiff fabrics, as they can make it difficult to achieve the desired shape.
2. How do I make sure my bucket hat fits properly?
To ensure a good fit, measure your head circumference before cutting the fabric. Most patterns will include sizing information. Additionally, use interfacing to reinforce the fabric, especially in the brim, for better structure.
3. Can I sew a bucket hat by hand?
Yes, you can sew a bucket hat by hand if you don’t have access to a sewing machine. It may take longer, but hand sewing can give you more control, especially for intricate details. Just make sure to use strong thread and small, even stitches.
4. How can I customize my bucket hat?
There are countless ways to customize your bucket hat! You can add embroidery, attach patches, use fabric paint, or sew on a ribbon for added flair. Let your creativity shine by incorporating personal elements into your design.
5. What should I do if my hat doesn’t hold its shape?
If your bucket hat is floppy or doesn’t hold its shape, consider adding interfacing to the brim or using a heavier fabric for more structure. Ensure that all seams are secure and consider topstitching around the brim for extra stability.
6. How do I care for my finished bucket hat?
To care for your bucket hat, check the fabric care label. Most cotton and canvas hats can be machine washed in cold water. Avoid bleach, and air dry to maintain the shape. If you’ve added embellishments, hand washing is recommended to prevent damage.

Conclusion
Sewing a bucket hat is a rewarding and creative project that allows you to express your personal style while honing your sewing skills. By following the steps outlined in this guide—from selecting the right fabric to adding custom touches—you can create a unique accessory that is both fashionable and functional.
As you embark on this journey, remember to pay attention to detail and take your time, especially with the cutting and sewing processes. Avoid common mistakes, and don’t hesitate to customize your hat to make it truly your own.
With practice, you’ll gain confidence in your sewing abilities and discover the joy of making accessories that not only look great but also reflect your personality. Whether you’re making a bucket hat for yourself or as a gift for a friend, each piece you create is a testament to your creativity and craftsmanship.
Now that you have the knowledge and inspiration to start sewing your own bucket hat, gather your materials and let your imagination run wild! Happy sewing!

Call to Action
Are you ready to create your very own bucket hat? Don’t wait any longer—gather your materials, choose your favorite fabric, and start sewing today! Whether you’re a seasoned crafter or a beginner, this project is perfect for unleashing your creativity and making a stylish statement.
Once you finish your bucket hat, be sure to share your creation with us! Tag us on social media or leave a comment below with photos of your unique designs. We can’t wait to see how you customize your hats!
If you’re looking for more inspiration or need supplies, check out our online store for a wide selection of fabrics, patterns, and accessories to help you along the way. Join our crafting community and discover more tips, tutorials, and creative ideas to elevate your sewing projects!


